Monday, August 31, 2015

New Recipes Loaded To Our Recipe File

Have you been busy and maybe missed the latest recipes to be added to our recipe file?
How about s'mores from the oven or a fresh, easy three bean salad with an Italian twist? 

My hubby loves three bean salad but I like to mix it up a bit and this version is less sweet, fewer calories but packs in a lot of fresh the garden flavor.


While camping this summer, we had to make our s'mores in the trailer's oven due to campfire restrictions out west. This is a great way to make s'mores for a party or when you don't have a crackling fire to roast your marshmallows over.


Hands down this is my favorite new recipe to hit the blog. I made this several times this summer and it is perfect for hot days when you don't want to turn on the oven. Use your slow cooker and make this wonderful cobbler. Crock pot berry cobbler will be devoured to the last crumb.


We have tons of recipes on our recipe page. Last count I think we are almost to a 100!

Wednesday, August 26, 2015

Decorating With Crocks

Decorating with crocks and using them around the house for display is so fun. I love collecting antique crocks and displaying stoneware crocks tucked here and there in our home.

primitives, check lamp

When putting things back after Christmas, I decided to group some of my decorating with old crocks in the dry sink. One of my girlies gave me the little primitives sign for Christmas. The candle lamp below was thrifted from Goodwill. That will be my main source of new stuff for the house for a while as we are putting all extra cash into some home maintenance for now. I do have some gift cards to my favorite store though so I will get to do a little shopping for the house.

pig cutting boards, candlestick lamp

The warm colors make decorating with stoneware crocks to cozy.

old stoneware crocks, butter paddles, wire basket


dry sink, prim decor

Tips for decorating with stoneware crocks:

1. Atop cabinets is a great place to display and collect old crocks. Make sure they are stable and will not fall. You can tuck dried or silk flowers in them.

2. On shelves is another great place to display crocks. Use them as book ends as they are nice and heavy. Display crocks in groups of threes for best effect.

3. On the floor makes decorating with large crocks the safest. They are heavy and should be low to the ground. You can fill them with a collection like we did with our rolling pins, a favorite way to display crocks.

Monday, August 24, 2015

How To Clean Mini Blind Cords

I am going to share how to clean mini blind cords. In my kitchen I have wood mini blinds and I already shared how to clean wood blinds but this technique works great with cleaning metal mini blinds too.


Now that the blinds are clean, we need to clean the cords and I will share how I clean the mini blind cords without removing them from the wall.

For this cleaning job you will need:
Very hot tap water
A large jar or plastic bag
Clean rags

Take a half cup of your Oxiclean and dissolve in hot water in your large container. My blinds like you see above are in the kitchen window so I used a tall glass container. Set up the jar so the cords can soak at least an hour in the Oxiclean. Keep checking for whitening. When they are clean, just take a very damp cloth and wipe down and clean off excess Oxiclean and let them air dry.

Now for my blinds that were hanging near the kitchen table, I used a large freezer bag and put the cords in the hot solution to soak, sealed the bag and then my hubby wrapped it around with a zip tie to secure the bag to the cord so it could hang there and soak.

If you are cleaning your mini blinds and need to remove them because it is in an area you do not want to risk getting wet, take the blinds down and then just let the cords soak in the hot solution until clean. You can clean the blinds while the cord is soaking too.

This technique cleans the white cords and makes them look new again. I do this about once a year and clean my blinds at the same time.

Saturday, August 22, 2015

Healthy Greek Chicken Burgers

A perfect low fat burger option. A flavorful tangy barbecue recipe too, Greek chicken burgers are  perfect for pan frying as well.

This recipe was born out of a desire to eat less red meat but still enjoy a hardy burger. It is fabulous. This is my recipe for juicy Greek chicken burgers. Hubby and kids love them.

Greek Chicken Burgers (this recipe makes eight nice sized patties)

2lb. ground chicken. (I get this at Fresh and Easy but I am sure it is available all over or ask the butcher)
1/2 c. crumbled feta cheese
1/3 c. chopped up Greek olives
salt and pepper to taste
Greek seasoning (I get this from Pampered Chef and it is divine but you can use whatever herbs you would like)

Form into patties. I find they are the juiciest if I add a little olive oil and fry them in my large non-stick pan. Cook about 5-7 minutes per side. I brush the buns or rolls with a little olive oil and toast in the broiler before serving. Top with baby spinach or lettuce tossed in oil and vinegar and sliced tomatoes or top as you would a regular burger. My kids eat them with mayo an pickles like any old burger but these are fabulous.


We serve them with tomato and fresh spinach leaves for a healthier option.


Tuesday, August 18, 2015

5 Fun Back To School Centerpieces

It's that time again. New books, a new school year and to celebrate, how about some back to school decorating ideas.

I like to cheer the kids on and help get them excited by doing something special with apples, school themed decor, chalkboards, pencils. A back to school centerpiece adds a special touch to the new school year.

Homeschool Decorations for Motivation

As a homeschool mom for over 24 years, I need to get myself excited as well for the new year. I am schooling my 4th and last student right now so we like to jazz up our school table for the seasons and back to school decor is probably the most important of the year. You can find all my homeschooling posts here.


back to school decorating ideas


And finally, how about a couple ideas from us.
This first back to school display is really not a centerpiece but shows if you collect items with an educational them, you can make a sweet back to school vignette.


And this little back to school table idea I just threw together last year when school was upon us but I wanted to do something special for the girls.

Please check out our other back to school posts.


Sunday, August 16, 2015

How To Set Up A Camp Kitchen

I love camp cooking. As soon as we arrive to our campsite, I set up my camp kitchen. I'll show you how to set up a camp kitchen cause for me organization is the key to successful and enjoyable camping. 

How to set up a camp kitchen
camping tips

 Having everything at hand in an organized camp kitchen, makes preparing all that yummy camp food easy. Camping can be a lot of work but if you prepare ahead with your organized camping supplies, you will enjoy that meal prep time and fellowship with your friends and family in the great outdoors.

camp kitchen
 Believe it or not, I asked for this folding camp kitchen for Mother's day a couple of years ago. It keeps everything right at my fingertips.

Here is an organized camping list for your kitchen:
Lantern
Paper towels
Trash bags
Trash can
Matches or clicker lighter
Plates and silverware, napkins
Reusable tablecloth
Foil
Pots and pans and cooking tools
Tea kettle
Coleman Coffee Maker (An awesome portable propane coffee maker)
Non stick spray (makes clean up easy)
Spices
Dish pan
Wash cloth and towel
Dishsoap

I prefer to set up my camp kitchen with my propane stove at the end of my picnic table. That way I am right where the action is and I can leave hot pans on there to serve from.

I find having everything at hand makes meal prep easy and I love this collapsible camp stove holder. It folds up into a small bag too.

folding camp kitchen

If we are camping for at least a few days or the picnic table is small, I pull out my folding table and set up our meal and coffee goods here. Less in and out of the trailer to get what you need. I love this wire silverware, paper goods picnic caddy. It keeps all items organized.

camp table

Here is another idea I am going to implement next camping trip. I love this hanging camping organizer. It would be great to hold things up out of the way and keep them from getting piled up on your camp table.

hanging camp organizer

I love this camping collapsible sink. You could really use it anywhere in the house too but it folds up totally flat. Just throw in your camping bin or under your sink.
Follow us on youtube.
Check out my post on an easy cheap way to organize your plastic silverware.
You can check out my review of the Coleman portable coffee maker.
Check out all our camping and RV posts here.
Affiliate links in this post.

Friday, August 14, 2015

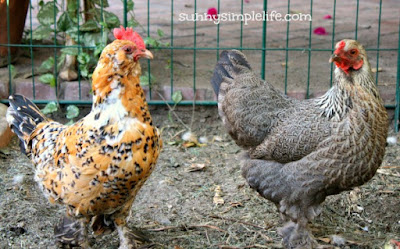
Tips on Urban Chicken Keeping

I would love for you to visit my new Facebook page, Urban Chicken Keeping. With the rise in chicken owners, a large group of those are living right in the heart of the city or suburban areas.
We'll talk all things chicken but we will especially share tips on raising urban chickens in city backyards.
best chicken coop
                                                             Urban Chicken Keeping

Please come by and like us, maybe share a post and let me know you were there. Thanks so much!

Thursday, August 13, 2015

Italian Three Bean Salad

There are lots of three bean salad recipes out there. Here is a zesty take on the classic three bean salad. Perfect for a summer meal, barbecue or a picnic.

Italian Three Bean Salad

Ingredients
  • 2 Cans Green Beans
  • 1 Can Garbanzo Beans
  • 1 Small Can Kidney Beans
  • 1 Cup Diced Celery
  • 1/4 Cup Diced Roasted Red Peppers
  • Handful Chopped Fresh Basil and Parsley
  • 1 Teaspoon Finely Diced Red Onion
  • 1/3 Cup Apple Cider Vinegar
  • 1/8 - 1/4 Cup Sugar (to taste)
  • 1/4 Cup Olive Oil
  • 1 Teaspoon Salt (to taste)
  • 1/4 Teaspoon Black Pepper
  • 1/2 Teaspoon Italian Seasoning
Cooking Directions
  1. Drain all the beans and rinse the kidney beans. In a large bowl put the beans, herbs, onion, celery and peppers. In a small bowl mix together the other ingredients and pour over bean salad. Stir well. Place in refrigerator. Make this early in the morning or the day before for the best flavor.

Tuesday, August 11, 2015

How To Make An Inground Composter For Your Garden

I am going to show you how to make a super easy DIY inground composter and for free too!

Not everyone has the space or desire to keep a large compost pile that you have to turn and maintain. Maybe you don't want to worry about attracting critters to a compost bin in your backyard. I am going to show you how I made an inground composter that also acts as a worm composter you place right in your garden.


To begin, find a spot in your garden where maybe you want to revive the soil. Cause this is going to do it for you. 

1. Take a five gallon nursery pot. They have large drainage holes and you want that.

2. Now dig a hole where you want the compost bin about four inches deep and set the pot drainage holes down in the hole. Fill in the dirt around the pot.


Now find an old bucket. I use a galvanized one. They fit perfectly down in the pot. This will act as a lid keeping flies and rodents out. I have even used a terra cotta pot that fit too.

Begin adding your kitchen scraps. Only fruit and vegetable scraps. But don't forget the eggs shells and the coffee grounds. Throw them in there too cause the worms will love them.


About twice a week, squirt some water in there. It helps flush the nutrients down into the soil.
Keep the lid on at all times. Every once in a while, lift the pot and you will see all the worms that are coming into the pot through the drainage holes. They are breaking down the scraps and making great fertilizer.

I usually plant around the base and the plants will love it. In the photo above I have an inverted tomato cage and have planted cucumber vines to grow up the wire supports.

When your plants are done and you are ready to pull them out, go ahead and move the pot to a new hole and area of the garden you want to revitalize the soil a bit.

Sunday, August 9, 2015

Baked S'mores In The Oven

Thanks to my sister in law for this wonderful idea of baked s'mores. Making s'mores in the oven is so much less messy but also fun to do when you aren't sitting around a campfire.
camping food, s'mores
When we were camping recently, there were no campfires allowed due to our drought here in California. Everyone wanted s'mores so my sister in law suggested we due them in my trailer oven.
They were AMAZING!

Now first get yourself a disposable pan from the dollar store. Spray a bit of non stick spray in the pan. Line your chocolate up first along the bottom of the pan and them arrange the marshmallows along the top. We used the extra large marshmallows here. They are our favorites for s'mores. Can never have enough gooey marshmallow goodness.
camping food, oven smores
Place the s'mores in the oven at 300 degrees for about ten minutes. Watch until the marshmallows are nice and soft. You can stick them under the broiler for a few seconds to just brown the tops of the marshmallows but watch them constantly.

When done serve them with graham crackers and a spoon so everyone can scoop some s'mores up onto a paper plate. 

Sunday, August 2, 2015

Glow Stick Bowling - Frugal Outdoor/Camping Game

For camping fun or for some backyard after dark games, you can't beat glow stick bowling.
In fact it was so much fun that the adults played too.

camping games, backyard games, glow stick bowling

Talk about a frugal camping game. All you need is ten empty water bottles, ten glow sticks and a ball. I bought my glow sticks at the Dollar Tree and used a light up ball we already had. We spent only a few bucks to pull this together.

glow stick bowling, camping games, backyard fun

We did not add water in the bottles because our ball was on the small side but if you are using a larger heavier ball, you could add an inch or so of water. Happy glow stick bowling!!